Last week we released the second version of Elcomsoft iOS Forensic Toolkit, our physical acquisition tool for iPhones and iPads. For the first time ever, the toolkit comes with the ability to acquire information from jailbroken 64-bit iPhones such as Apple iPhone 5S, 6/6S/Plus, and 64-bit iPads including iPad mini 2-4, iPad Air/Air2 and iPad Pro.
The 64-bit acquisition process differs significantly from the old methods we used to extract data from 32-bit devices. The new method is backward compatible with 32-bit iPhones and iPads; however, if you have a choice, we recommend sticking with the old and proven acquisition routine if you’ve got a 32-bit iPhone to extract.
Important note: a working jailbreak is absolutely mandatory for the new acquisition process to work.
If you don’t want the theory, you may skip directly to the step-by-step guide to physical acquisition for 64-bit devices.
64-bit Process and Traditional Physical Acquisition Compared
In order to successfully operate on Apple’s 64-bit devices, the new acquisition process must work within the limits of the target platform. Apple’s 64-bit platform implements much stricter security compared to legacy devices based on older hardware; as a result, there are certain limitations to 64-bit acquisition that one never has to deal with when acquiring 32-bit hardware.
The first difference between the two acquisition methods lies in the output data format. The 32-bit physical acquisition process returns the complete, bit-precise image of the device by accessing the data in raw mode. The 64-bit platform implements stronger protection, making it possible to dump a disk image but never releasing the encryption keys required to decrypt files. For this reason, the 64-bit acquisition process is limited to using higher-level access for capturing the file system in the form of a UNIX-style TAR archive. Mind you, the archive contains all of the same data as a raw dump produced by the traditional process. However, keychain items cannot be decrypted. Analyzing the file system image is also a bit more complicated compared to processing the full DMG image, as DMG images are supported by virtually all mobile forensic tools while file system dumps are not as widely supported (see list of recommended tools later in this article).
Here comes the second difference between the two acquisition methods. The 64-bit process can extract the keychain database from the device. However, with no access to device ‘securityd’ key, the new process cannot decrypt the keychain. Therefore, stored Web forms and passwords as well as other data put into keychain will remain inaccessible (at least for the time being).
Finally, you must unlock the device with the correct passcode and remove passcode protection in iOS settings before the extraction.
To sum it up, the 64-bit process has the following limitations compared to physical acquisition for 32-bit devices:
- Keychain extracted but NOT decrypted
- HFS+ file system image (64-bit) vs. bit-precise image (32-bit)
- Passcode must be removed in iOS settings prior to acquisition (64-bit)
Supported Devices and iOS Versions
Hardware wise, the 64-bit acquisition process supports all of the following devices regardless of the version of iOS they are running (assuming that a working jailbreak exists for that version of iOS):
– iPhone 5S, 6, 6 Plus, 6S, 6S Plus
– iPad Air, Air 2, Pro
– iPad mini Retina, iPad mini 3 and 4
The new acquisition process requires unrestricted access to the file system, and therefore it relies heavily on a device being jailbroken. Since new versions of iOS are a constant challenge for jailbreakers, you may be out of luck (at least for a while) if you encounter a device running the latest version of iOS that does not have a jailbreak so far. At this time, iOS 9.1 and 9.2 Beta still don’t have a working jailbreak, so you will be unable to use the new acquisition process on any of these devices.
Performing Physical Acquisition on a 64-bit iOS Device
The internals of the 64-bit acquisition process differ significantly from how it works on 32-bit devices. As a result, an extra step is required to perform physical acquisition on an iPhone 5S, 6/6S or any of the Plus versions.
Step 1. On your iOS device:
- Ensure that the device is jailbroken. Physical acquisition for 64-bit devices is exclusive to jailbroken iPhones, iPads and iPods. If it is not jailbroken, proceed to Install jailbreak.
- If OpenSSH is not installed, install it from Cydia or by following these instructions.
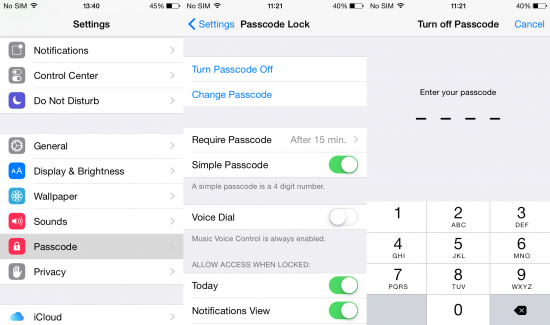
- Unlock the device by supplying the correct passcode.
- If the passcode was empty, go to iOS Forensic Toolkit.
- Disable passcode protection in iOS Settings ([Settings] | [Touch ID & Passcode] or [Passcode] | [Turn Passcode Off]):
![TurnPasscodeOff-3]()
Jailbreaking iOS 8 and 9 is a cumbersome process without guaranteed outcome. Depending on the version of iOS, you may need to follow different steps and use different tools to jailbreak.
What you need to know
In order to jailbreak an iOS device, you’ll need to disable several protection layers. In order to do that, you may need specifying the correct Apple ID password and entering the correct passcode (if either or both protection layers are enabled).
Preparing for jailbreak
- Before jailbreaking, you will need to unlock the iOS device using the correct passcode
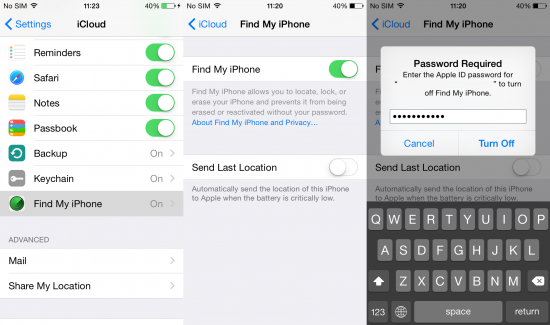
- Check if Find My Phone is enabled. If it is, in iOS Settings, disable it (Apple ID password required)
![DisableFindMyPhone-3]()
- Taig and Pangu jailbreaks require disabling Touch ID and passcode protection. If you haven’t disabled it during the previous step, do it now. Check if passcode protection is enabled (if you had to enter a passcode in order to unlock the device, it is.) If enabled, in iOS Settings, disable Touch ID and Passcode (original passcode required).
Install jailbreak
For iOS 8.x (all versions): use TaiG jailbreak and follow the instructions at http://www.taig.com/en/
For iOS 9 through 9.0.2: use Pangu jailbreak and follow the instructions at http://www.downloadpangu.org/pangu-9-download.html
iOS 9.1 and 9.2: at this time, no jailbreak is available.
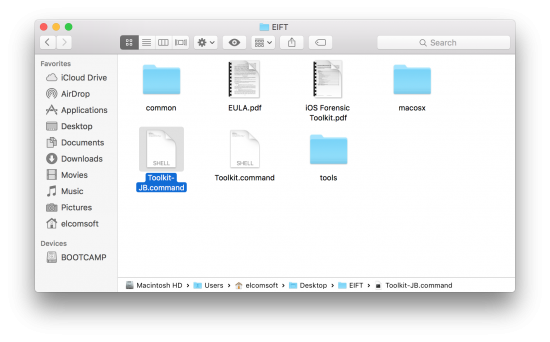
Step 3. Connect the device
Once your device is jailbroken, you may connect it to your computer via the Lightning cable. Launch iOS Forensic Toolkit. The majority of available options are unavailable for 64-bit devices. The 64-bit acquisition process is available under the “TAR FILES” command.
Step 4. Use iOS Forensic Toolkit
- Launch the Toolkit.
![toolkit]()
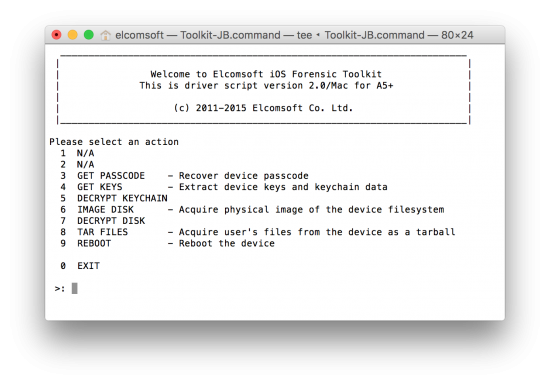
- Use the “TAR FILES” command (item #8) from the main menu. This will return a UNIX-style TAR archive of the file system complete with all application data. The keychain database will also be extracted; however, it won’t be decrypted as keychain decryption keys are not accessible on 64-bit devices.
![main_menu]()
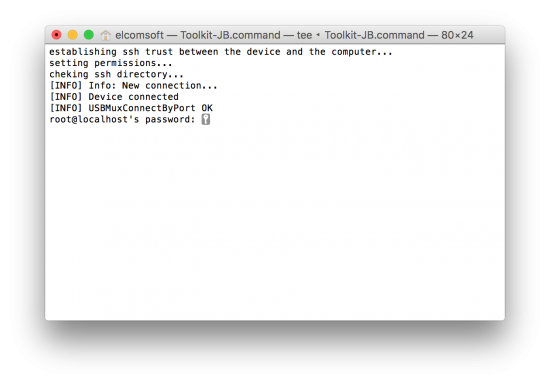
- If prompted, enter the root password. By default, the root password is ‘alpine’. You will need to enter the password twice.
![password1]()
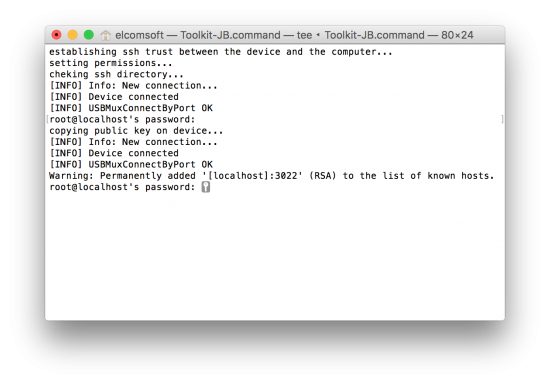
- Re-enter the root password:
![password2]()
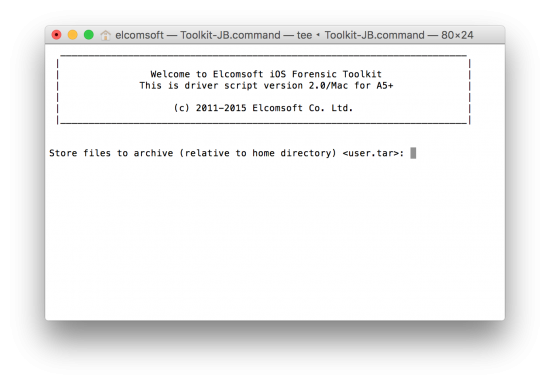
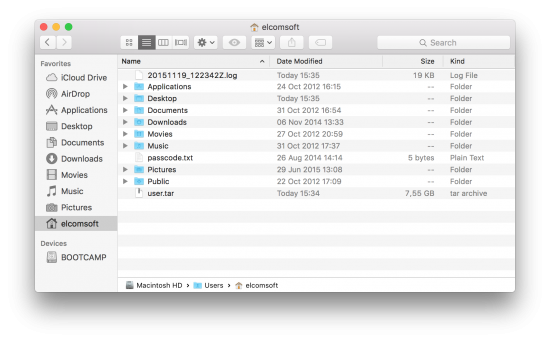
- Specify file name. The path is relative to the home directory.
![tar]()
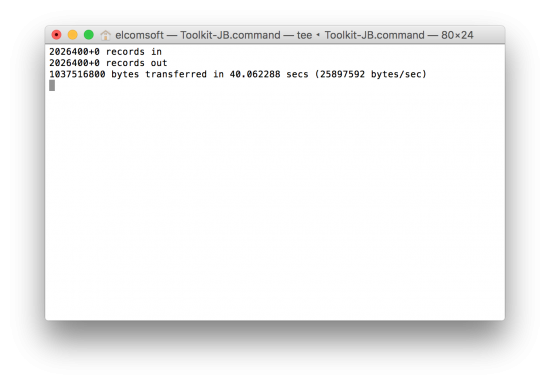
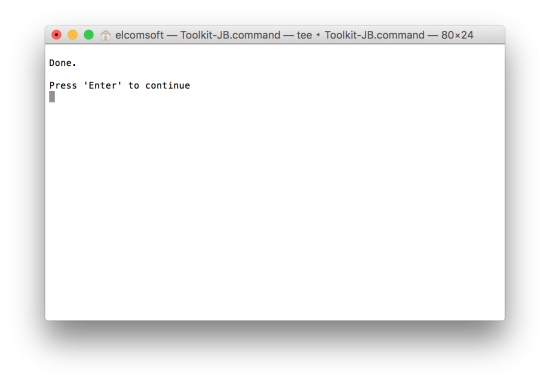
- Wait while the file system is being extracted. This can be a lengthy process, especially when acquiring devices with large amount of data (in our lab, it took us about 10 minutes to pull 7.5GB of data).
![tar_creating]()
- When the process is finished, disconnect the device and proceed to analyzing the data.
![tar_done]()
What is Available via 64-bit Physical Acquisition
The 64-bit acquisition process returns the full file system of the device including the keychain (which, unfortunately, cannot be decrypted). We got access to all of the following data that is NOT available in either iTunes or iCloud backups:
- Location data (/private/var/root/Library/Caches/locationd)
- Downloaded mail (/private/var/mobile/Library/Mail)
- Health data (/private/var/mobile/Library/Health)
- Music (/private/var/mobile/Media/iTunes_Control/Music)
- Detailed battery usage (/private/var/mobile/Library/BatteryLife)
- Application data and caches (/private/var/mobile/Containers/Data/Application/, /private/var/mobile/Library/Caches)
- Mobile Safari cache – history, recent searches and more (/private/var/mobile/Containers/Data/Application/4FF7BF97-4B3B-4964-ACD8-974AADB8D4F8/Library/Safari)
- Lockdown certificate info (/private/var/root/Library/Lockdown)
- CPU usage data (/private/var/mobile/Library/CoreDuet)
- Push notifications (/private/var/mobile/Library/ApplePushService)
- Battery usage (/private/var/mobile/Library/BatteryLife)
- Configuration files (/private/var/mobile/Library/Preferences)
- Network and data usage (/private/var/networkd, /private/var/wireless/Library/Databases)
- Various log files (/private/var/log, /private/var/logs, /private/var/wireless/Library/Logs, /private/var/mobile/Library/Logs)
- SHM and WAL files for all SQLite databases (delayed transactions)
- Applications activity (/private/var/mobile/Library/AggregateDictionary)
- Spotlight data (/private/var/mobile/Library/Spotlight)
- Keyboard cache (/private/var/mobile/Library/Keyboard)
The logs include information on application install/uninstall, restoring from backup, syncing and pairing, application crashes, GSM network connections, iCloud access (by app), iOS updates, application crash logs, info on device on/off, diagnostics and security logs and more.
Caches include a lot more than just application cache. In addition to that, you’ll get cache of the data downloaded over the Internet, screenshots of applications’ recent state (at the time they were suspended), information stored in the clipboard of the device, and much more.
There is quite more data to analyze, especially in the /private/var/mobile/Library folder.
Interestingly, some of this data is also available when performing acquisition of a locked device even if you don’t know the passcode.
Locked Device, Unknown Passcode
The new acquisition process can be used to pull some information from 32-bit and 64-bit devices that are locked with an unknown passcode (jailbreak required). While that includes devices that were powered on (or rebooted) and never unlocked. Jailbreak is absolutely mandatory; we cannot pull anything from a non-jailbroken device with an unknown passcode!
The amount of information that can be extracted varies depending on whether or not the device was unlocked at least once after it powered on or rebooted. If the device was never unlocked after a reboot, only a very limited data set is available. If, however, the user entered the correct passcode at least once, a lot of information (such as the SMS database, contacts database, Wi-Fi password etc.) is decrypted and can be extracted later on even after the device is subsequently locked.
The following data can be pulled from jailbroken, passcode-locked devices:
- Some geolocation data (cellular tower and compass calibration data incl. coordinates)
- Incoming calls (numbers only) and text messages
- App and system logs (installs and updates, net access logs etc.)
- SQLite temp files including WAL (Write-ahead logs)
What exactly may or may not be available from a locked device depends, in particular, on whether or not the device was unlocked at least once after booting up. For example, incoming text messages will be placed into a temporary, unencrypted database if the device was never unlocked after booting up. If, however, the device was unlocked at least once, all text messages will be transferred into the encrypted database even if they were received while the device was subsequently locked. As a result, if a device was unlocked at least once AND is has a jailbreak installed, it may be possible to pull a lot more data compared to devices that were never unlocked after the boot. This is one of the reasons why you should do your best to prevent seized devices from switching off (using the Faraday bag and charger routine).
Viewing and Analyzing the Image
The 64-bit acquisition process returns an archived (.TAR) image of the device’s file system. If you are using Windows, simply extracting the files and folders from the TAR archive may not return the complete content of the archive since some files and folders may contain characters that are not allowed in NTFS or exFAT. You can either allow the archiver to rename these files or extract information onto a mounted HFS/HFS+ volume.

If you are using a Mac OS X computer, you could simply mount the DMG image (extracted via the 32-bit process) as a virtual disk. However, the 64-bit process does not return a DMG image, meaning you’ll have to manually extract the file system from the TAR archive and analyze the files individually. Converting a TAR image of the file system into a mountable DMG image is possible; we are currently working on a tool to perform the conversion on-the-fly during acquisition. Keep tuned for iOS Forensic Toolkit 2.1!
If you are using a Windows PC to analyze the extracted data set, you may need installing a third-party tool in order to mount the HFS+ volume. We assembled the list of tools to help you mount the HFS+ volume on a Windows PC.
- HFSExplorer (free)
- Paragon HFS+ for Windows (free or $19,95)
- Mediafour MacDrive
You can also try using BootCamp drivers:
- http://forums.macrumors.com/threads/apple-hfs-windows-driver-download.1368010/
- http://lpmv.epfl.ch/page-109141-en.html
Analyzing the extracted data set is available with many forensic tools. We found BlackLight by BlackBag Tech to work great (Mac OS X only).
Potential Legal Implications
Physical acquisition for 64-bit devices is a more invasive process compared to acquisition methods available for old hardware. It does involve modifying system settings (removing passcode protection), and it does write files onto the phone (OpenSSH must be installed on the device for the process to work). If the device does not have a jailbreak installed, it must be jailbroken prior to acquisition, which once again modifies the system and data partitions.
With all that in mind, evidence obtained with the new extraction process may not be admissible in the court unless every step is properly documented. Producing and obtaining device backups (making the device produce an offline backup via iTunes or an online one via iCloud) prior to attempting physical acquisition is highly recommended. You can use Elcomsoft Phone Breaker 5.0 to decrypt the local backup or to download one from iCloud.